> For the complete documentation index, see [llms.txt](https://docs.powerviz.ai/powerviz/llms.txt). Markdown versions of documentation pages are available by appending `.md` to page URLs; this page is available as [Markdown](https://docs.powerviz.ai/powerviz/installation-guide/adding-the-powerviz-visuals-as-organization-visuals.md).
# Adding the Powerviz visuals as Organization visuals
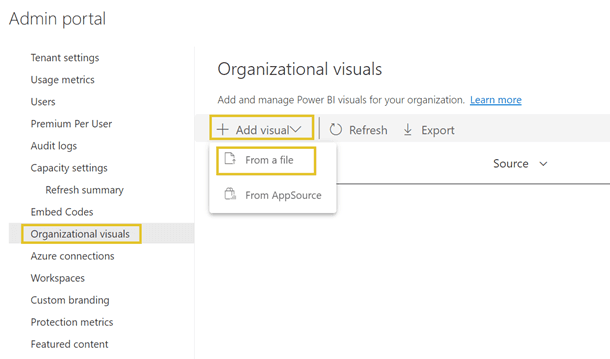
* Open [Admin Portal](https://app.powerbi.com/admin-portal/organizationVisuals) of powerbi.com
* Go to the Organization visuals section
* Click on the “Add Visual” → “From a file”
 * Update the visuals with new versions:
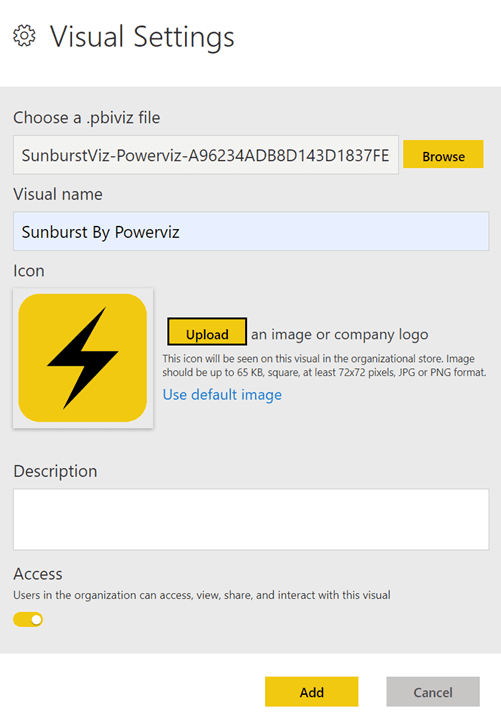
* Click on “Browse” and select the Powerviz Visual (.pbiviz file) downloaded in the first step.
* Also Enter Visual Name, Choose Icon ([Icons Download Link](https://truviz-my.sharepoint.com/personal/krishna_truviz_ai/_layouts/15/onedrive.aspx?ga=1\&id=%2Fpersonal%2Fkrishna%5Ftruviz%5Fai%2FDocuments%2FPowerviz%20assets%2FPNG%20logos%2F20x20)) and configure other settings.
* Click on “Add” button to add the visual.
* Update the visuals with new versions:
* Click on “Browse” and select the Powerviz Visual (.pbiviz file) downloaded in the first step.
* Also Enter Visual Name, Choose Icon ([Icons Download Link](https://truviz-my.sharepoint.com/personal/krishna_truviz_ai/_layouts/15/onedrive.aspx?ga=1\&id=%2Fpersonal%2Fkrishna%5Ftruviz%5Fai%2FDocuments%2FPowerviz%20assets%2FPNG%20logos%2F20x20)) and configure other settings.
* Click on “Add” button to add the visual.
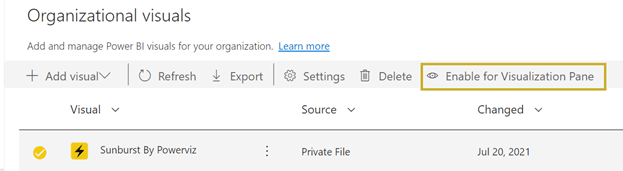
 * Once it is added, select the visual and click on “Enable for Visualization Pane”
 * Repeat the process for all the visuals that are downloaded in the first step